This tutorial will give you an idea about the jmeter and each step to install jmeter; instruction to setup for selenium automation testing to load and performance testing.
What is Jmeter ?
The Apache JMeter™ application is open source software, a 100% pure Java application designed to load test functional behavior and measure performance. It was originally designed for testing Web Applications but has since expanded to other test functions.
JMeter is not a browser, it works at protocol level. As far as web-services and remote services are concerned, JMeter looks like a browser (or rather, multiple browsers); however JMeter does not perform all the actions supported by browsers. In particular, JMeter does not execute the Javascript found in HTML pages. Nor does it render the HTML pages as a browser does (it’s possible to view the response as HTML etc., but the timings are not included in any samples, and only one sample in one thread is ever displayed at a time).
You can learn more about jmeter using this link.
Install Jmeter And Selenium Setup
Install Jmeter
Prerequisites
- Your computer needs to be installed Java 7 or above before proceeding to the Jmeter installation. You can download the Java from this link.
Installation Steps
- Download Jmeter file from this link. (download binaries zip to install on windows and other tgz to install on linux. Also you download the source codes as well since it’s open source 🙂 )
- Once you download the zip or tgz file, extract it in you computer on preferred location.
- Go to the extracted root folder, then redirect to bin, open ApacheJmeter.jar (You may ask running platform when it’s open at the first time, select java)
That’s all Enjoy Jmeter.

Install Plugin Manager in Jmeter
My opinion is installing plugin manager in jmeter is a must. We could easily install plugins though the plugin manger without confusing jar files copy pasting. Please go through below easy step to install plugin manager in Jmeter.
- Download the plugin manager Jar file using this link.
- After installing the jar files, paste in the following path, <jmeter root folder>/lib/ext
- restart the jmeter.
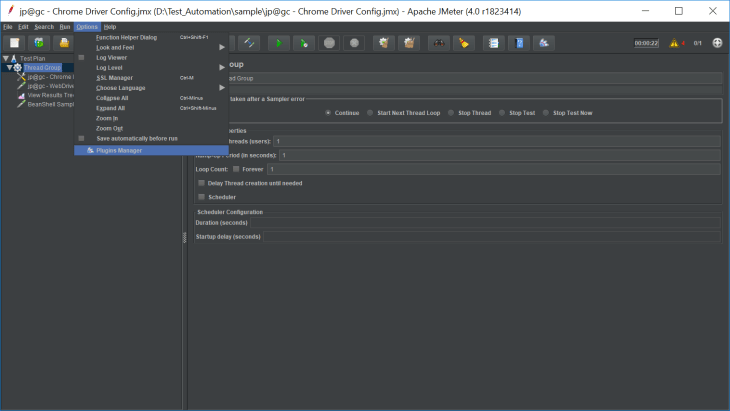
- verify plugin manager installation once jmeter restarted; go to the Options menu->plugin manager
Install Selenium Webdriver Plugin
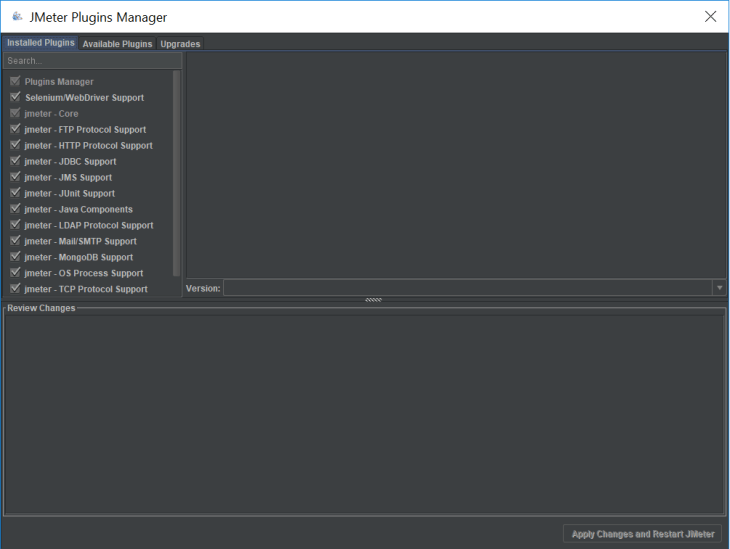
- Open plugin manager.
- navigate to the available plugin tab.
- search selenium webdriver and tick on selenium webdriver support plugin.
- press install and restart jmeter button.

Configure Chrome/Firefox Driver
To run the selenium testscripts we need to configure chrome or firefox drivers in Jmeter. For that you need to create a testplan; file->new; then you could create a new test plan.
Now you have to create a thread group for that; right click on newly created test plan->add->Threads(Users)->Thread group

Now you can create a configuration for Chrome or firefox. In here chrome configuration is illustrated, You could do the firefox and other browser configuration by following the same steps.
To create the configuration file; right click on previously created thread group->add->config element->Chrome driver config

Once you created the chrome driver config, you will see a window as below. Navigate to the chrome tab and insert the chrome driver exe file path.
If you don’t have the chrome diver exe file; you can download from this link.

Now you have successfully created the configuration for chrome.
Create a Listener
You could create a listener to listen the results of our test cases. It gives the end results of our test cases. Mostly used to get statistics for performance test results.
There are several listeners available in Jmeter, we use tree view listener for our exercise.
right click on previously created thread group->add->listener->View Results Tree

Create a Webdriver Sampler
We could create a webdriver sampler and directly write selenium test scripts through Jmeter, else if you have pre-written selenium scripts you could export it to a jar file and run it through the Jmeter. For more go to this link.
For this exercise, we will create a webdriver sampler and execute a simple selenium script.
to create a webdriver sampler right click on previously created thread group->add->sampler->WebDriver Sampler


Running the Script
Before running the script make sure, you have followed all the steps above. Your final setup should be like below,
In the webdriver sampler, you could write your selenium script and run it by pressing green color arrow button (start button).
You can change the thread properties in Thread Group and run the scripts in different ways.

Also by opening the View Results Tree, you could see the end results of your test plan.
That’s all Friends. Happy Testing.

 Note : You can find the location url in this link.


