What is TestNG ?
TestNG is a testing framework inspired from JUnit and NUnit but introducing some new functionalities that make it more powerful and easier to use
such as:
- Annotations.
- Run your tests in arbitrarily big thread pools with various policies available (all methods in their own thread, one thread per test class, etc…).
- Test that your code is multithread safe.
- Flexible test configuration.
- Support for data-driven testing (with @DataProvider).
- Support for parameters.
- Powerful execution model (no more TestSuite).
- Supported by a variety of tools and plug-ins (Eclipse, IDEA, Maven, etc…).
- Embeds BeanShell for further flexibility.
- Default JDK functions for runtime and logging (no dependencies).
- Dependent methods for application server testing.
For more information visit this link.
Why TestNG ?
TestNG has more functionalities when compared to other testing frameworks. Also it supports well on Selenium. It supports latest platforms and frameworks as well (Java 7 and above). Last but not least due to the rich annotations we could code our scripts very easily.
How to install TestNG on Eclipse
Step 1
- Open Eclipse – if you don’t have eclipse you download it from this link.
- go to the help menu and click on install new software

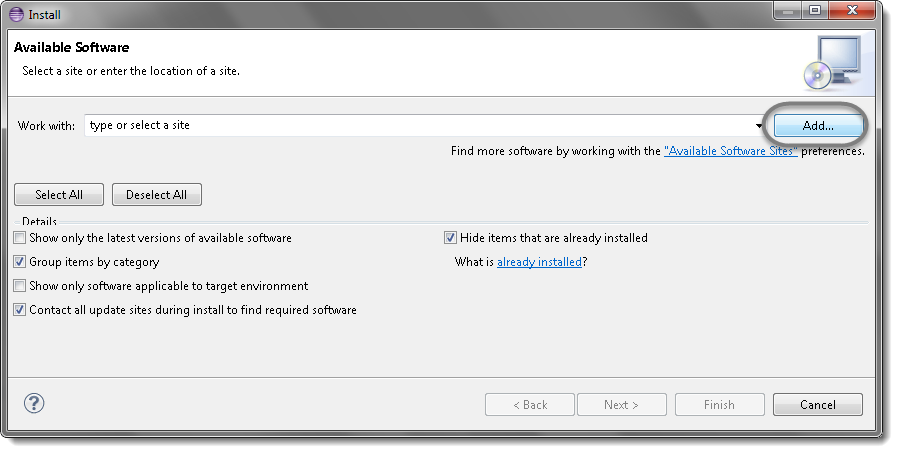
Step 2
- a pop up window will open, click on add button as below,

- another pop up window will open as below, enter “TestNG” and type “http://beust.com/eclipse/” as location. Click OK
 Note : You can find the location url in this link.
 - You will come back to the previous window, but with testng option.

- check the testng and click on next button.

Step 03
- Read the agreement and accept.

- if you see any security warning press ok. This warning is populated from eclipse due to it’s policy on third party installations.

- After installation, eclipse need to be restarted. Press yes on below window.


Step 04
- After restarting the eclipse, verify testng is installed correctly as below.


That’s all friends, Enjoy automation testing.
